JaneLaverick.com is thrilled to be mutually linked to the Milliput website. Milliput, as you may recall from a few posts ago, is a two part epoxy resin, developed for the automotive and plumbing (Plumber ho!) industries which is indispensible in modelling. I have used it for making master models for all my plaster of Paris doll moulds for 17 years and simply couldn’t work without it.
Before I begin to describe the process of modelling, a note about copyright is essential. You should be aware that a shape, simply by being made is copyright. If you use Milliput or any other means, such as plaster casting described in previous postings, to reproduce the work of another artist, including all the branded goods that are available, for example war gaming models, collectables, plastic figures, dolls and so on, you are in breach of copyright. It’s illegal. As simple as that. I know when you begin to model anything, it seems impossible to make a model that looks like anything at all, except possibly a lump of Milliput. But nicking the legs, head or whatever off somebody else’s model is not on. It is very important to allow your skills to develop through all the stages of ghastliness until you can make a thing that looks like a thing – which thing to do is a thing that is not an easy thing. However, if you persevere, you will eventually develop a modelling style that is all your own and that will include even the bits you find tricky and it will all look like yours.
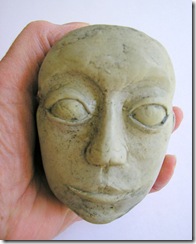
One of the features of modelling that I have discovered through years of interviewing artists, is that for most people a light goes on in your head when you find your scale. If you’re Michelangelo, you find bigger than life size statues very satisfactory, if you’re a miniaturist something under six inches looks good to you. If you are modelling for a specific purpose, such as wargaming, model railways or dollshousering, then your scale is set for you. If you are just making ‘a’ doll and Milliput is to be the medium for the doll rather than the substance for the master model, weight is a consideration. Four full packets of Milliput weigh about a pound (1Lb.) and would make the body of a 14 inch life size newborn baby doll. Add six packets for the limbs and another three or four for a head and you have a three or four pound doll, which is quite heavy. Such a doll, if you get the bottom modelled right, would sit very solidly but be weighty to manipulate and dress. Here is the original head model for the mediaeval angel that is item 5 in the shop.
As you can see it’s quite a handful. This head weighs 13 ounces, about the same as a rock of this size. A master model for a porcelain casting needs to take into account the shrinkage rate of the casting in the kiln as the air is removed from each molecule of clay and the shape contracts. The shrinkage rate varies with individual brands of porcelain, the one I use is about 14%. If you are considering, for example, paper clay models, or any other material which will work in a plaster mould by water loss through the porous plaster, you should model the master larger than the finished artefact to allow for this. The finished angel is 16 inches. In hollow porcelain this is still quite a handful, in solid Milliput I’d consider it quite unwieldy. It is very interesting to note that this Milliput model for the head was made, I think, about 15 years ago. It has sat on top of a box of parts, uncovered, in a single wall uninsulated garage for 15 years. It still bears traces of the plasticene from the last time I took a mould from it and I could take another mould from it today, if I wished to do so. Milliput is exceptionally durable. I think this head contains about three packs of standard Milliput. I don’t find the standard yellow grey colour at all objectionable, I think it looks like rock.
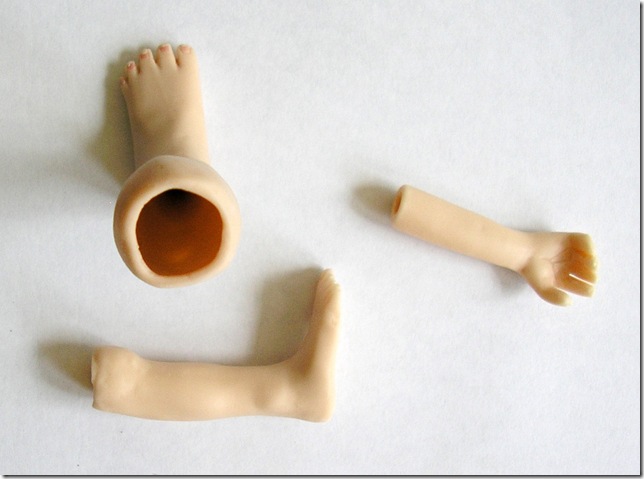
In consideration of the weight, if you are going to make a doll itself from Milliput, in sizes over six inches you will need substantial joints. These could be a fairly hefty wire. Look at doll making supplies catalogues for armature wire. The purpose of this (usually) square section wire is to glue inside of hollow limbs such as half arms, from hand to elbow, like these miniature ones but larger:
Ask the suppliers which wire would be suitable for the size of doll you intend to make. If you are just having a try initially, to see if you like it, take a pair of side cutting pliers to a wire coat hanger and make yourself some joints. The modelled Milliput, as it cures, will grab the wire for you which will stay embedded in the model part. You could assist the adhesion by turning a loop on the end of the wire with the pliers.
Scale of wire joints is dictated by the size of the doll and how stiff you wish the joints to be. Coat hanger wire is appropriate to dolls of 15 inches or so, for smaller dolls, say 12 inches, whilst it is possible to get proper armature wire in assorted gauges, you might wish to be creative, I have used several strands of garden wire (for tying up climbing plants) successfully for 10 inch dolls. You could also try twisting thinner wires, such as craft wire, together. Some dolls’ house dolls with metal bodies have joints designed this way.
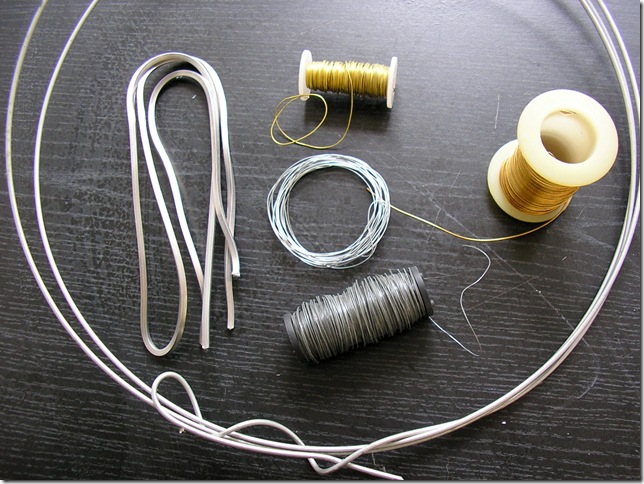
In the picture, inside the roll of coat hanger type wire, which can be bought from hardware shops by length, the armature wire is on the left. In the middle at the top is brass craft wire then beneath, two types of wire sold for floristry uses, on the right is a thicker brass craft wire that I’ve used to make joints in this demonstration arm.
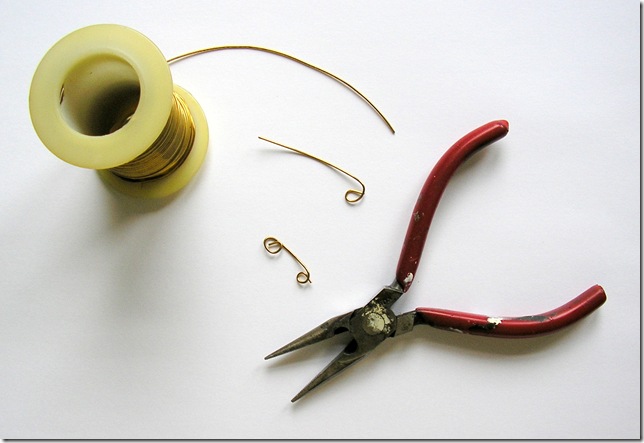
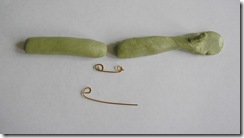
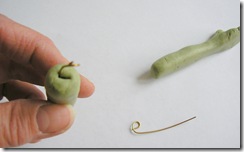
I have cut the wire with strong scissors and used small pliers to make a loop on each end.
Experiment with different thicknesses of wire until you find something that is strong enough yet sufficiently pliable for your size of doll. Mix up two lumps of Milliput roughly shaped into, for example, an upper arm and a lower arm and rough hand (hands are tricky, just do a mitten for now) and bury your wire joint in both Milliput arm parts.
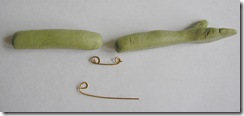
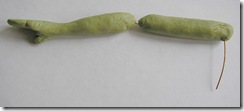
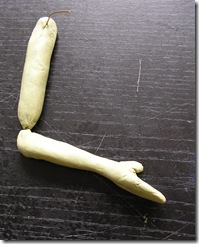
If you are the world’s worst modeller, just cut a quarter of each roll of Milliput from a pack, mix wearing rubber or plastic gloves until streak free. Roll a long sausage and chop it in half. In one half pinch the hand, roll the wrist with a finger and pull up a thumb. Make the wire joints an appropriate size, so they are big enough to do the job but not so huge they will show through the arm:
bury them inside each arm part in turn, then smooth the joint holes closed and flex the arm to determine the length of the joint necessary for movement. If the arm is to be clothed you may not notice if the joint is too long, though a long joint adds length to the arm but weakens it. However if the piece of wire is too short the pieces may not move. You do need enough wire buried in the arm for security, so it doesn’t pull out. Don’t forget to bury a similar wire for the shoulder joint before the Milliput cures.
It is possible to make an entire wire skeleton and wrap the Milliput body parts round it. Simpler would be these wire joints either with bent loops or wiggles of sufficient length, to prevent them coming out again. If the wire pops out of soft newly mixed Milliput while you are just starting and messing around with it, don’t be discouraged. If you leave the Milliput parts with the embedded wire to cure completely and have been generous enough with the wire, you will be amazed by the strength of your creation when it has solidified a few hours later. More amazingly, if you leave it in the garage on top of a heap of junk for fifteen years it will still be the same.
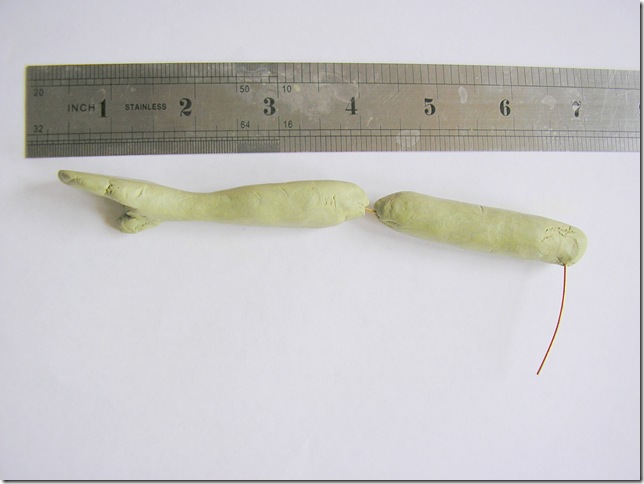
So now you have some Milliput and wire that works with it, all you need is a bit of advice about modelling bodies. There is some basic information on mixing in the ‘how to’ section of the Milliput website at www.milliput.com. As you can see my demonstration arms are not mixed properly, they still look streaky. Both arm parts have taken about quarter of a pack of Milliput, and a quarter of an hour of time. They have made an arm
7 inches long, which could be right for a tall slim 16 or 17 inch doll. One of the most difficult things to get right in the first place is the proportions of the human body. I’ll discuss this in another posting. Suffice it to say if you are really keen, you have enough basic information to have a go yourself. Original modelling is surprisingly exhausting. I wouldn’t recommend mixing a whole pack at once or expecting to make a doll in a sitting. At first mix no more than quarter of a pack and expect to do two parts of a limb. Smooth with water and work on a pile of old paper, I use printer rejects on the reverse. Fresh Milliput will pick up newsprint. Heads take a long time but you can leave a crudely modelled head shape and add the face later. Don’t expect to make the Spirit of Ecstasy or Michelangelo’s David first go. Even if you don’t joint your doll but make a solid model you’ll still love your creation.
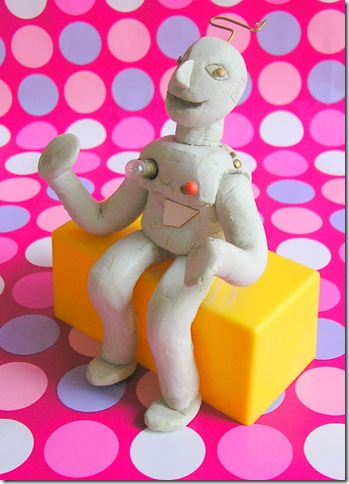
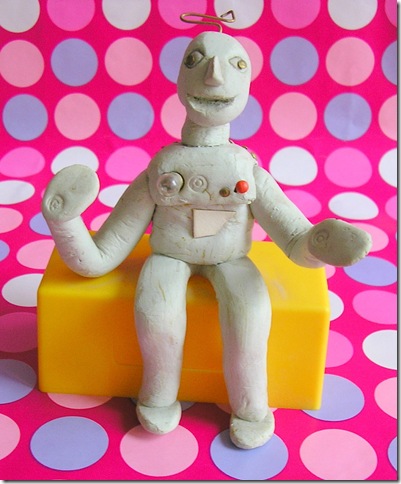
At the back of the shelves I found a robot I made possibly twenty years ago or more. He demonstrates beautifully not only the durability of Milliput but how readily it impresses, sticks to other materials, including plastic, metal and card and how much you will love your creations. Looking at this model now I consider it rudimentary but still good enough to post on Tinternet and not be embarrassed by.
As far as I remember the wire in his head has no loop on the inside end.
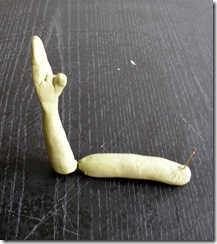
In the hour and a half I’ve been writing and proof reading, since I started mixing, the arm and buried wires are strong enough to bend:
and even to wave goodbye:
though it will be another couple of hours before they attain proper strength. The thickness of wire I’ve used in comparison with the thickness of arm is not really strong enough for a doll or figure that would be moved around often. For such a purpose I would twist two or three lengths of wire, allowing extra length when cutting that will disappear in the twists, for added strength. However, for a novice modeller, making such a lot of wire vanish in an arm could be a problem. The other problem is going to be keeping your hands off it long enough for it to cure. There is a horrible tendency in life generally to play with things before the glue has set. If you can manage to leave it alone to cure properly, you’ll find that even these ratios of single wire thickness to arm thickness are adequate to make a jointed figure strong enough to paint, dress, pose and rearrange occasionally. Milliput is neither suitable for children to model nor to make items for them to play with. You do need to wear gloves at the mixing stages. If following these ideas do take care, when cutting wire, of your fingers and eyes. When you’ve finished with the Milliput, especially if you’ve used water to smooth it, wash your hands well and get bits out of your fingernails. Other than that – have a go!
JaneLaverick.com – having fun with Milliput.

2 Responses to More about Milliput, weighty considerations in doll and figure modelling.